How to Install a Roof Rack: A Step-by-Step Guide
Embarking on road trips or simply managing a busy daily routine often demands more storage space than your car's interior allows. That's where a roof rack comes into play, becoming an indispensable companion for your vehicle. A roof rack is more than just metal bars atop your car; it's an enabler of adventures, a bearer of essentials, and a provider of extra space.
This guide is your roadmap to seamlessly installing a roof rack, ensuring you sail through the process with ease and confidence. Whether you're a seasoned traveler or a daily commuter, mastering the installation of a roof rack unlocks a new level of convenience for your journeys ahead.

Installing Roof Rack on Car: The Basic Steps
Installing a roof rack on your car enhances its utility by providing additional storage space. The process, while straightforward, requires attention to detail to ensure a secure and correct installation. Let’s delve into the basic steps involved:
Tools and Materials Needed
- Roof Rack Kit (crossbars, towers, and fit kit)
- Screwdriver or Torque Wrench
- Measuring Tape
- Rubber Mallet (if necessary)
Step-by-Step Installation
- Assemble the Roof Rack: Begin by laying out all the parts from the roof rack kit. Assemble the towers and crossbars as per the instructions provided.
- Measure and Mark: Measure the width of your car’s roof and the distance between the towers to ensure they are positioned at the correct width apart. Mark the positions lightly with a non-permanent marker.
- Position the Towers: Place the towers over the marked positions on your car’s roof. If your car has fixed points for a roof rack, align the towers with these points.
- Install the Crossbars: Attach the crossbars to the towers. Ensure they are parallel to each other and perpendicular to the sides of your car.
- Secure the Roof Rack: Using a screwdriver or torque wrench, tighten the bolts securely connecting the towers to your car and the crossbars to the towers. Double-check all connections to ensure they are tight and the rack is securely fixed.
- Check Stability: Give the rack a firm shake to check for any movement. A properly installed roof rack should feel solid and not move.
Following this guide and the instructions provided in your roof rack kit, you’ll have a sturdy and functional roof rack ready to serve your storage needs!
How to Install Roof Rack on Car Without Rails: Alternative Solutions
Cars without built-in rails may seem challenging for roof rack installations, but several alternative solutions exist. Among these are clamp-on racks and suction cup racks, each with its own set of advantages.
Clamp-On Racks
Clamp-on racks attach directly to the door frame of your car.
- Position the clamps on the door frames, ensuring an even placement on both sides.
- Tighten the clamps securely but without over-tightening to avoid damaging the door frame.
Suction Cup Racks
Suction cup racks utilize powerful suction cups to adhere to the roof, providing a rail-free solution.
- Clean the roof thoroughly to ensure a strong grip.
- Place the suction cups on the roof, press down firmly to create a vacuum seal, and then lock them in place.
Both installation methods are designed to provide a stable and secure roof rack setup on your car, extending its carrying capacity for various needs. The selection between clamp-on and suction cup racks depends on personal preferences and the car’s design. Adhering to the specific installation instructions for either type will lead to a secure and functional roof rack setup.
Upon successful installation, the Universal Car Roof Racks serve as a robust platform for transporting extra cargo or equipment, facilitating your needs whether for daily commutes or adventurous excursions. Choosing the suitable rack type and following the installation guidelines ensures a reliable roof rack setup, ready to accommodate your storage and transport needs.
How to Use Roof Rack Cross Bars: Maximizing Utility

Cross bars are crucial components in a roof rack system, acting as the bridge between the two roof rails, providing a sturdy base upon which to secure your cargo.
Attaching Cross Bars
- Align the cross bars with the slots or clamps on the roof rails, ensuring they are parallel to each other.
- Secure them tightly using the provided clamps or bolts, checking for stability before proceeding.
Maximizing Utility
Cross bars provide a versatile platform for carrying various items. Utilize accessories like cargo boxes, bike carriers, or kayak mounts to securely attach items to the cross bars.
Load Distribution and Securing Items
- Balancing Load: Distribute the weight evenly across the cross bars to maintain stability and prevent any damage to the roof rack or your car.
- Securing Items: Use high-quality tie-down straps, and ensure all items are tightly secured to prevent movement during transit. Double-check all fastenings before hitting the road.
- Load Limit Adherence: Abide by the manufacturer's recommended maximum load limit to ensure safety.
By properly attaching and utilizing cross bars, and adhering to load distribution guidelines, you’ll maximize the utility of your roof rack system, ensuring a safe and convenient way to transport extra cargo.
Roof Rack Positioning: Finding the Perfect Spot
Correct positioning of a roof rack is pivotal for ensuring safety, reducing wind noise, and enhancing your vehicle's carrying capacity.
Finding the Optimal Position
- Alignment:
- Align the roof rack according to the manufacturer's instructions, usually parallel to the car's sides and at a specific distance from the front and rear ends.
- For vehicles without predetermined mounting points, find a spot where the roof is flattest to ensure a stable fit.
- Spacing:
- Space the cross bars as far apart as possible to distribute the weight of the load effectively, improving stability.
Common Issues and Avoidance
- Wind Noise:
- Incorrect positioning can lead to increased wind noise. Adjusting the position of the rack, or adding a wind fairing, can help mitigate this.
- Decreased Fuel Efficiency:
- Poor positioning may cause aerodynamic drag, reducing fuel efficiency. Ensuring a snug fit and proper alignment can help avoid this issue.
- Damage to Roof:
- Racks placed too close to the edges could damage the roof. Ensure the rack is positioned within the roof's strongest areas to prevent dents or scratches.
By adhering to the guidelines for optimal roof rack positioning and being aware of common issues, you'll ensure a secure, efficient setup, enhancing your vehicle's functionality while minimizing potential problems.
Choosing Roof Rack Accessories

When selecting accessories for your Universal Car Roof Racks, considering the following factors ensures you get the most out of your setup:
Compatibility and Installation
- Ensure the accessories are compatible with the type of roof rack you have.
- Check the installation process for each accessory to ensure it can be securely attached to the roof rack.
Security and Accessibility
- Look for accessories with lockable features to secure your items.
- Ensure easy access to your cargo while maintaining security.
Aerodynamics and Fuel Efficiency
- Opt for aerodynamically designed accessories to reduce wind resistance.
- Accessories that maintain a low profile can help in conserving fuel.
Durability and Weather Resistance
- Choose accessories made from durable materials to withstand harsh weather conditions.
- Weather-resistant coatings and materials will prolong the life of the accessories and protect your cargo.
Equipping your car roof racks with the right accessories enhances their functionality and ensures a smooth experience, whether you're heading out on an adventure or going about your daily routine. Thoroughly assessing each accessory for compatibility, security, aerodynamics, and durability ensures you make informed decisions, ultimately leading to a reliable and efficient roof rack setup tailored to your needs.
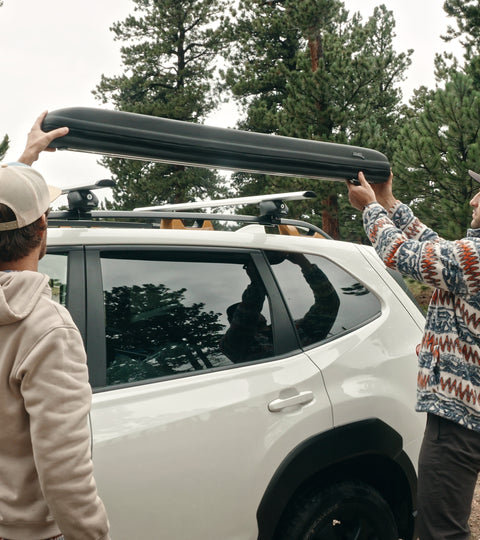
Why Our Car Roof Basket is the Ultimate Choice?

In this guide, we've walked through the essentials of roof rack installation, addressing different car types, and how to make the most out of your setup. Positioning your rack right is key to a safe and sound installation, ensuring your travels are hassle-free. But what brings this experience up a notch is the 3D® Car Roof Basket.
This isn't just any roof basket. Its universal fit makes it a buddy for many vehicle types. The installation? A breeze. Yet, it holds strong, no matter the adventure. Its versatility is unmatched - whether you're hauling camping gear, bikes, or just about anything else, it’s up for the task.
We’re all about making life easier and traveling better. This roof basket is more than just a storage solution; it’s a game-changer. We invite you to consider 3D® Car Roof Basket for your car. It’s versatile, it’s sturdy, and it’s ready to go places with you. Discover more about what this innovative gear can do for you here. Your on-the-road storage solution just got a whole lot better.